Launch offer — valid today only

Phlebotomy Program or Certification Exam: Tubes, Veins and the Order of Draw, One Topic per Page With Every Technique Drawn Step by Step!

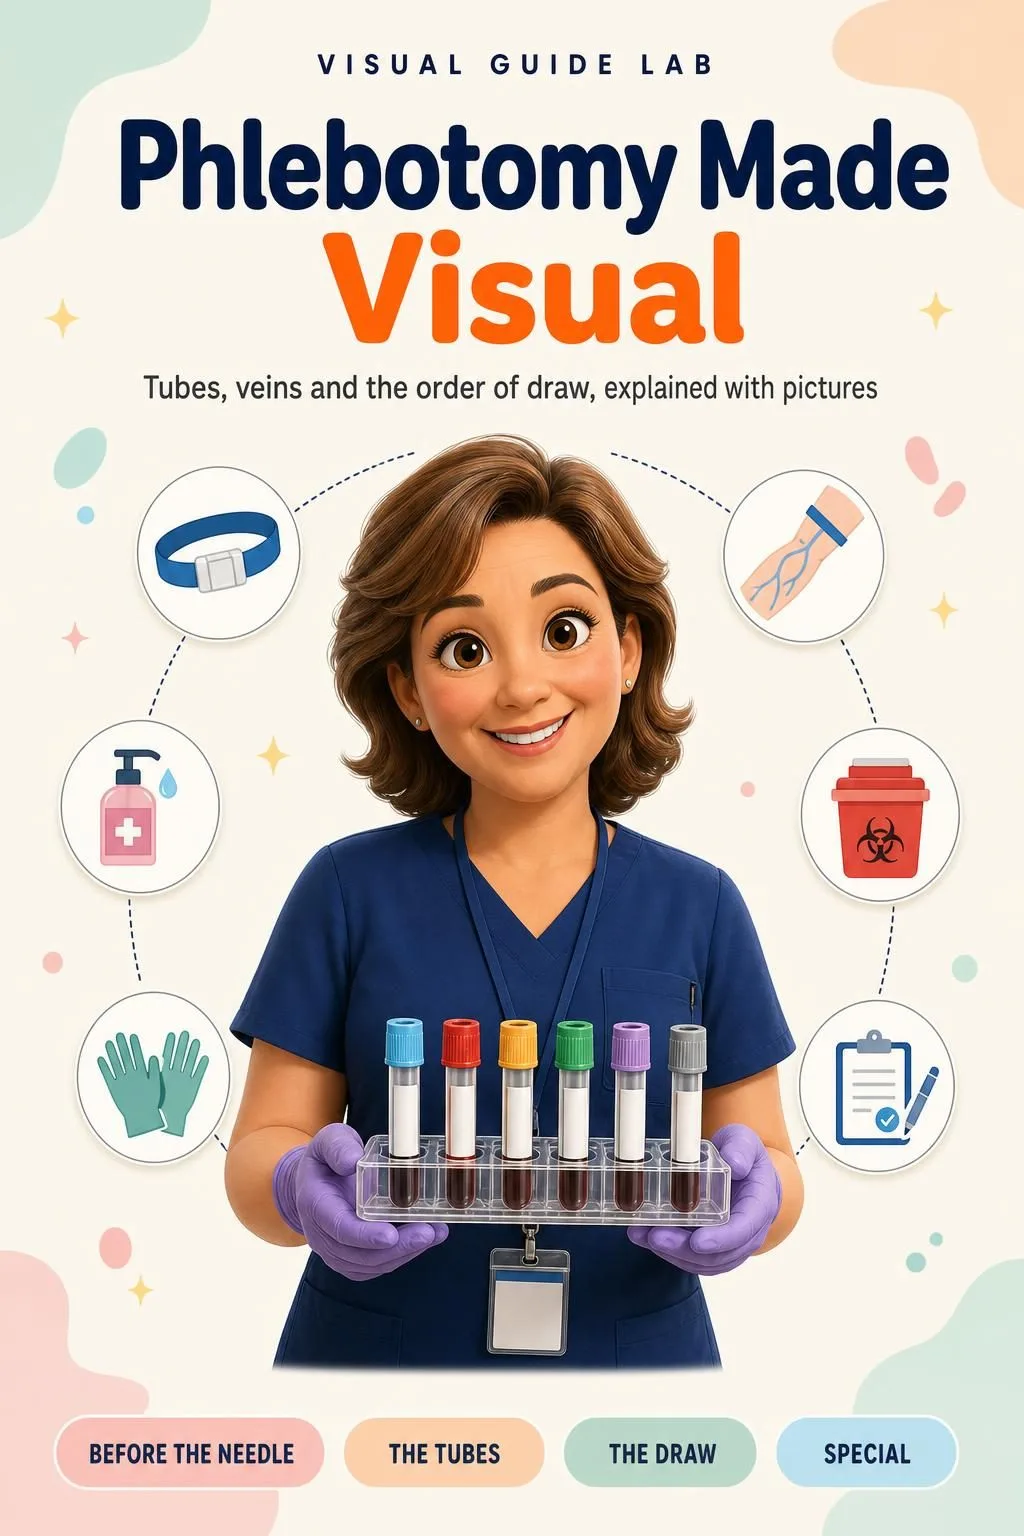
Patient ID, hand hygiene, the tubes, the order of draw, the veins of the arm, the tourniquet, the fingerstick and hemolysis. In your notes, it's a wall of text. Here, every topic fits on one page, with the drawing and what you need to remember. 53 illustrated pages.

YES, SHOW ME THE ILLUSTRATED BOOK

🔒 Secure checkout · PDF by email · 30-day guarantee

One topic per pageOne topic per page, every technique drawn
53 illustrated pages5 parts, from what a phlebotomist does to the numbers to remember
Up-to-date sourcesCLSI GP41 and GP42, and the OSHA Bloodborne Pathogens Standard

This Is What the Pages You Will Study Look Like

One topic per page, the drawing that shows you how it's done and the boxes with what you need to know:

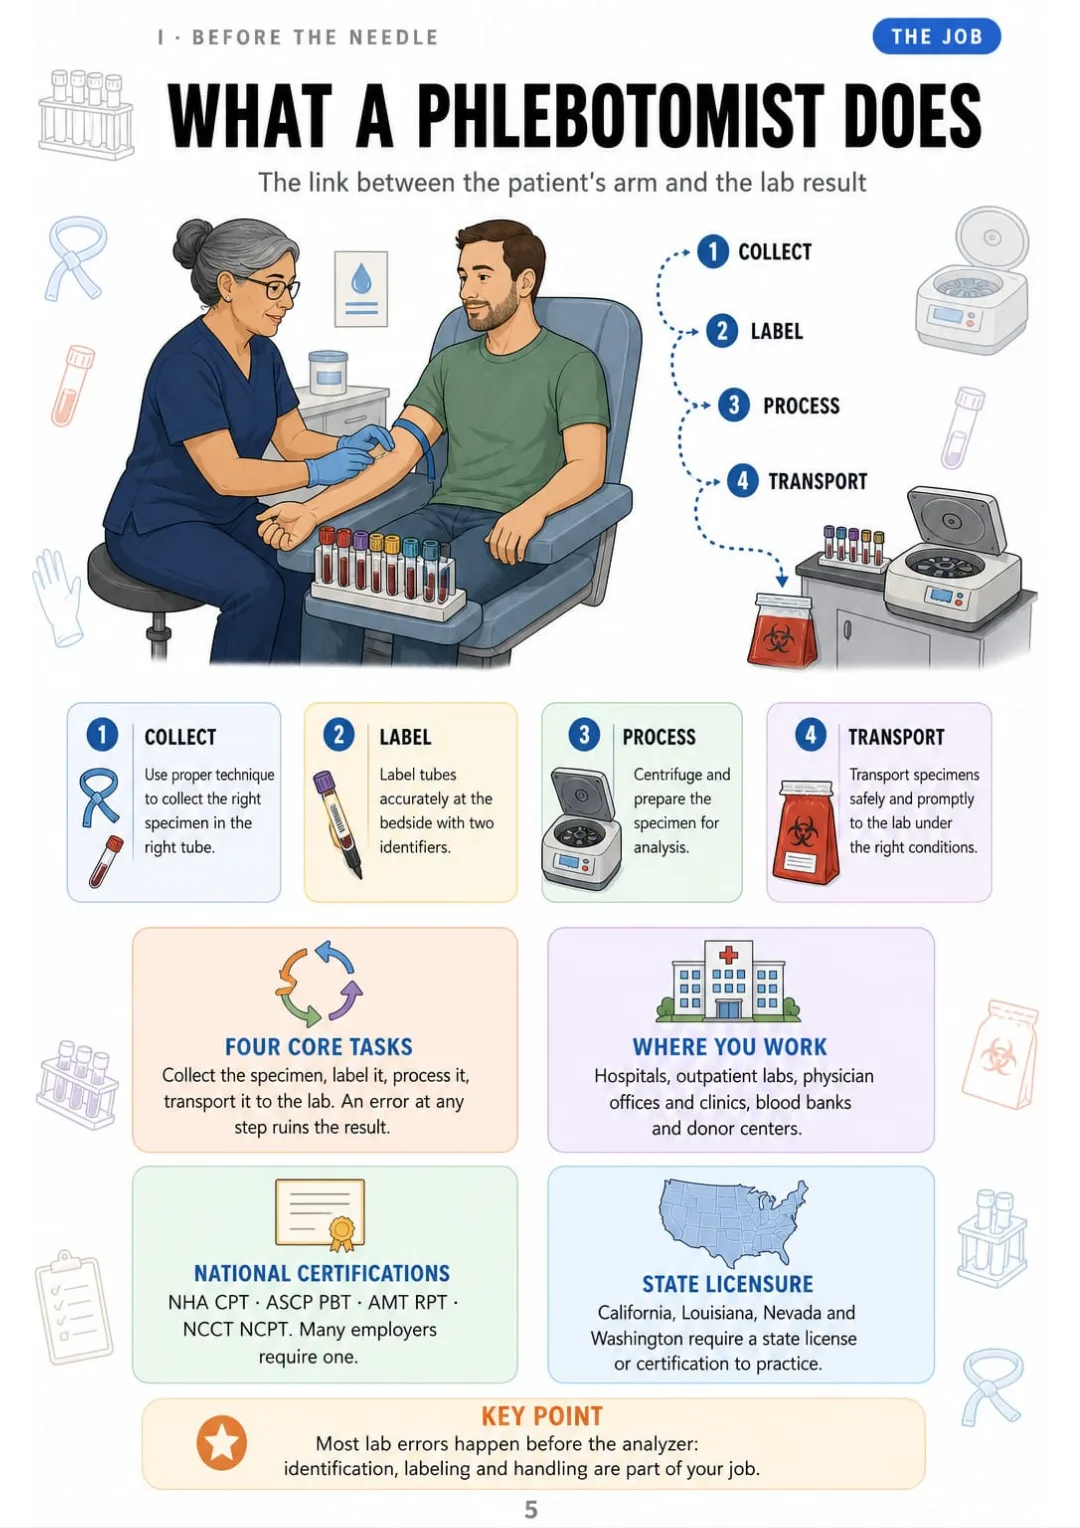
Four tasks, four certifications (CPT, PBT, RPT, NCPT) and four states with licensure.
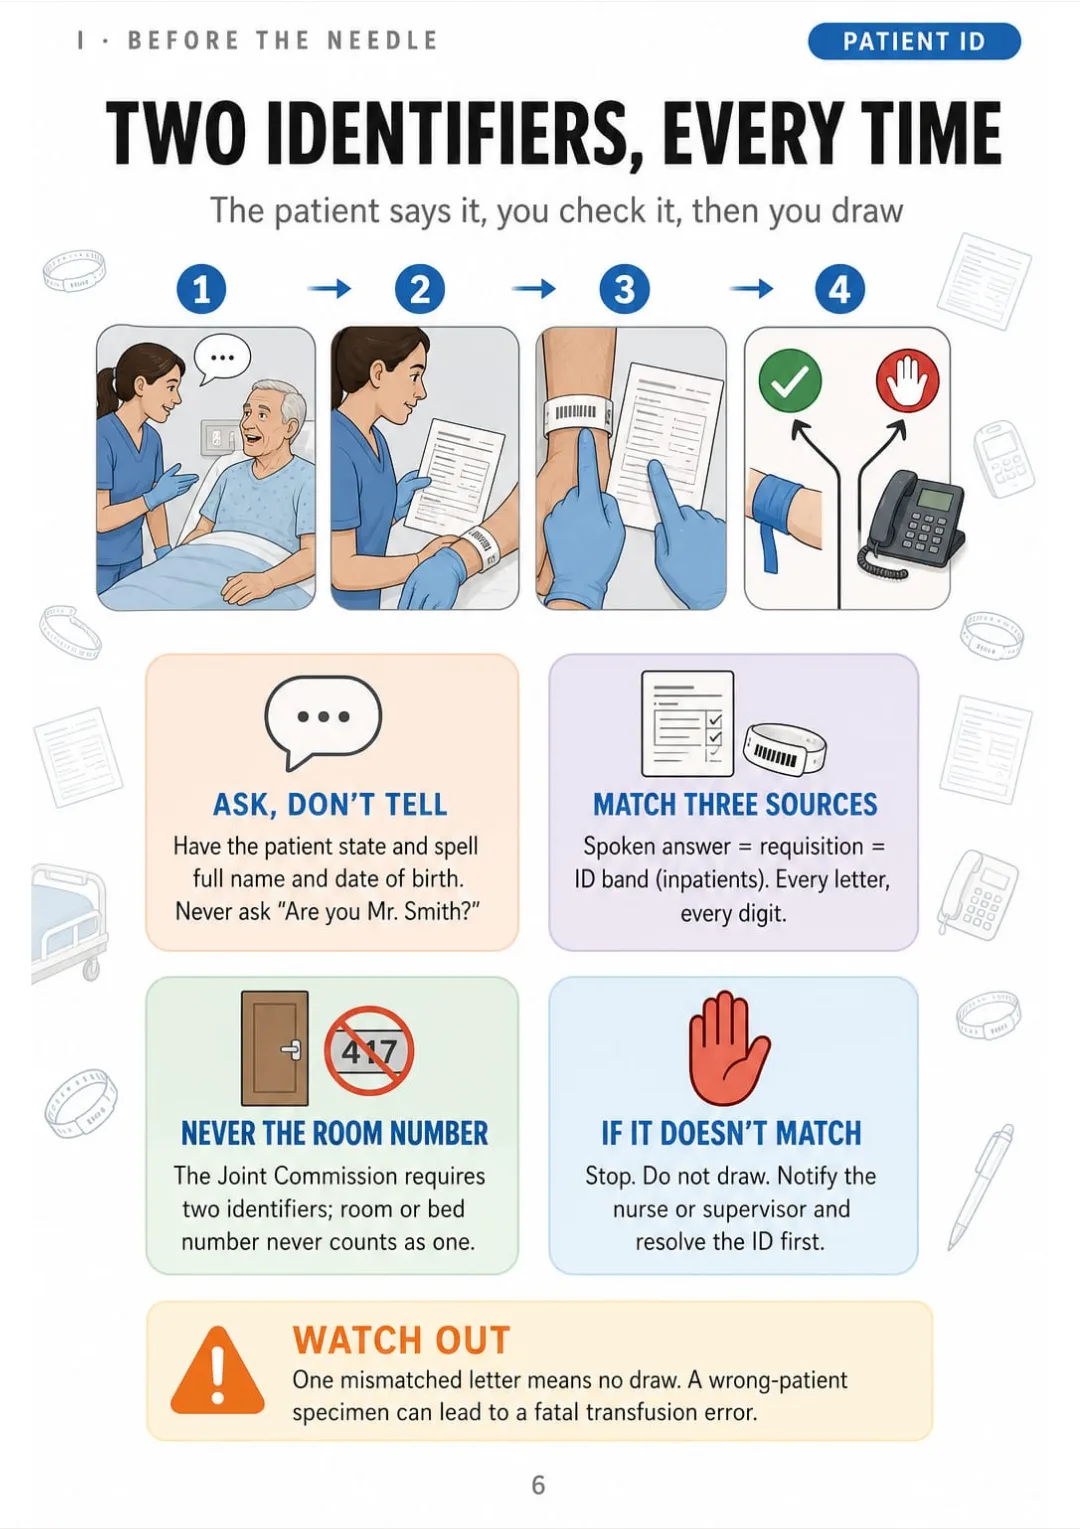
Two identifiers (name + DOB), checked against requisition and band; never the room number.
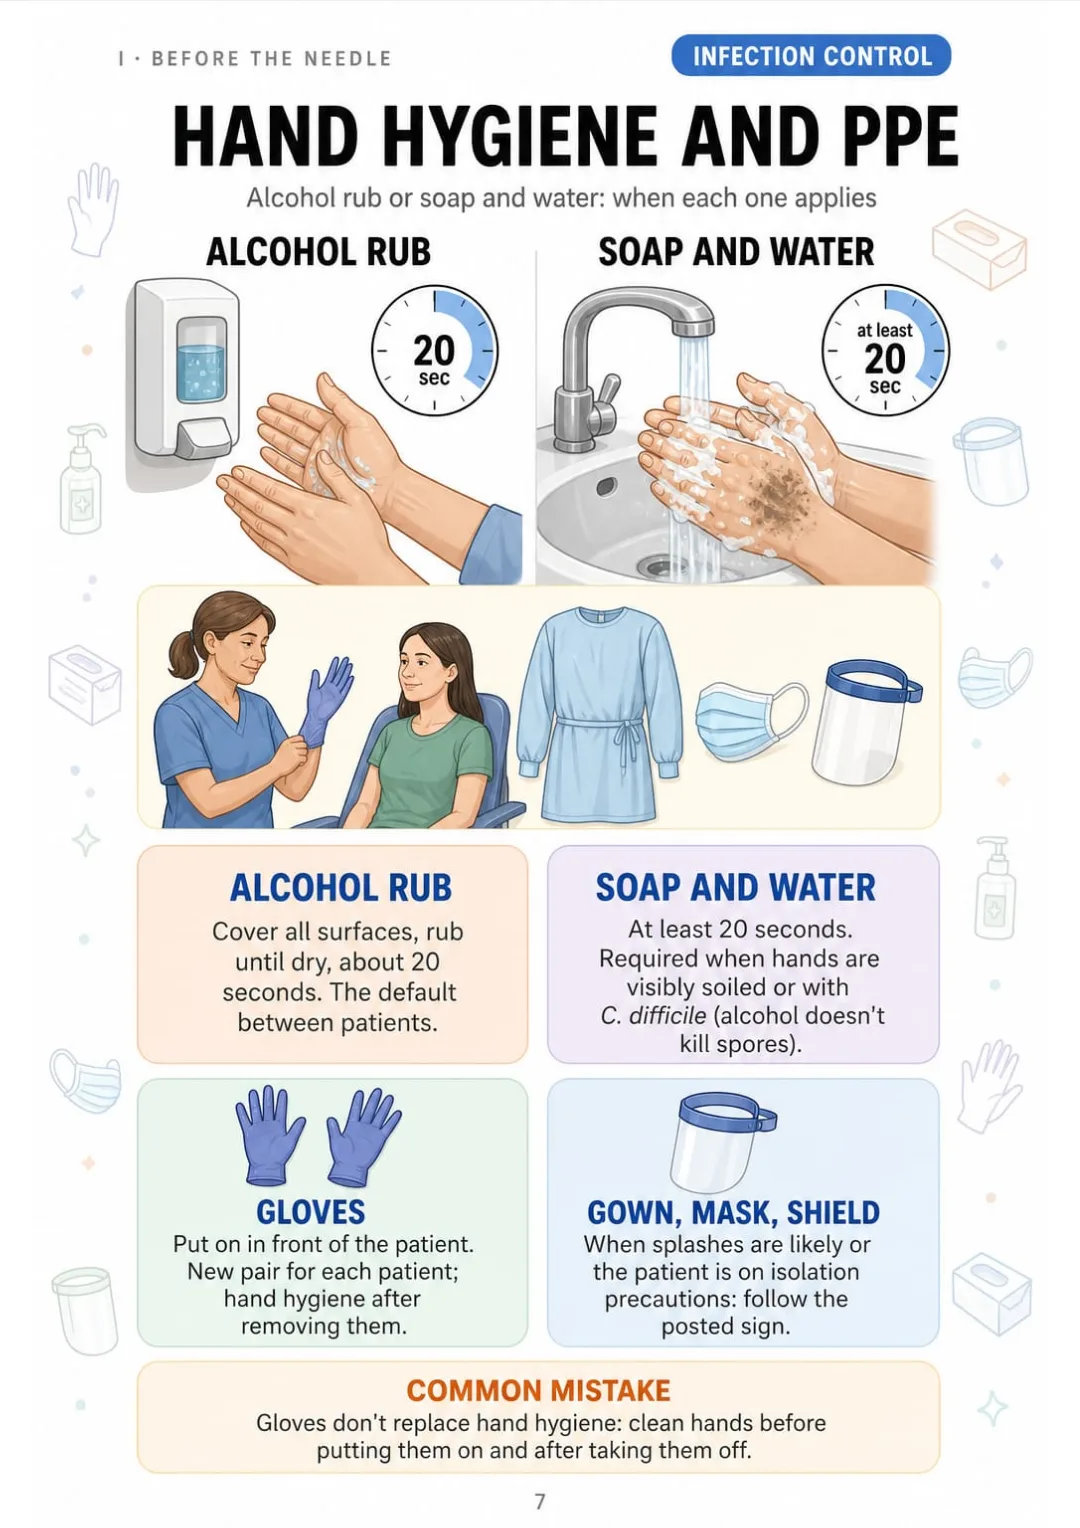
Alcohol rub until dry (~20 s) vs soap and water (≥20 s) for soiled hands or C. diff.
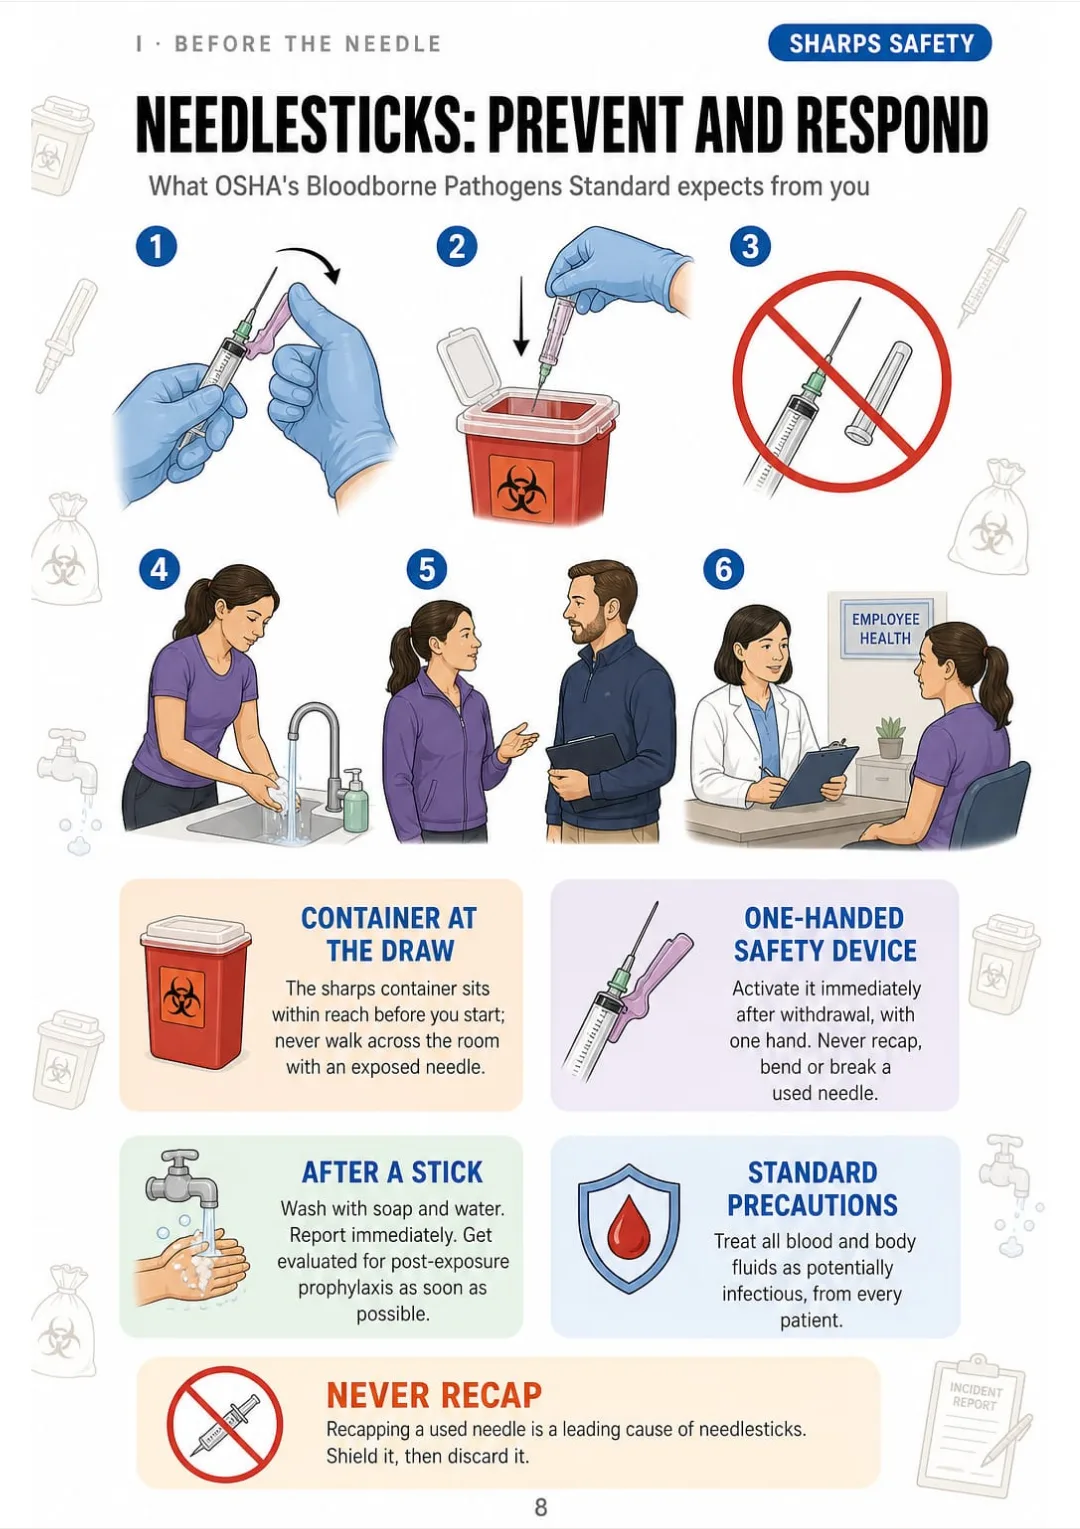
Safety device with one hand, sharps container at hand; stick = wash, report, evaluate.
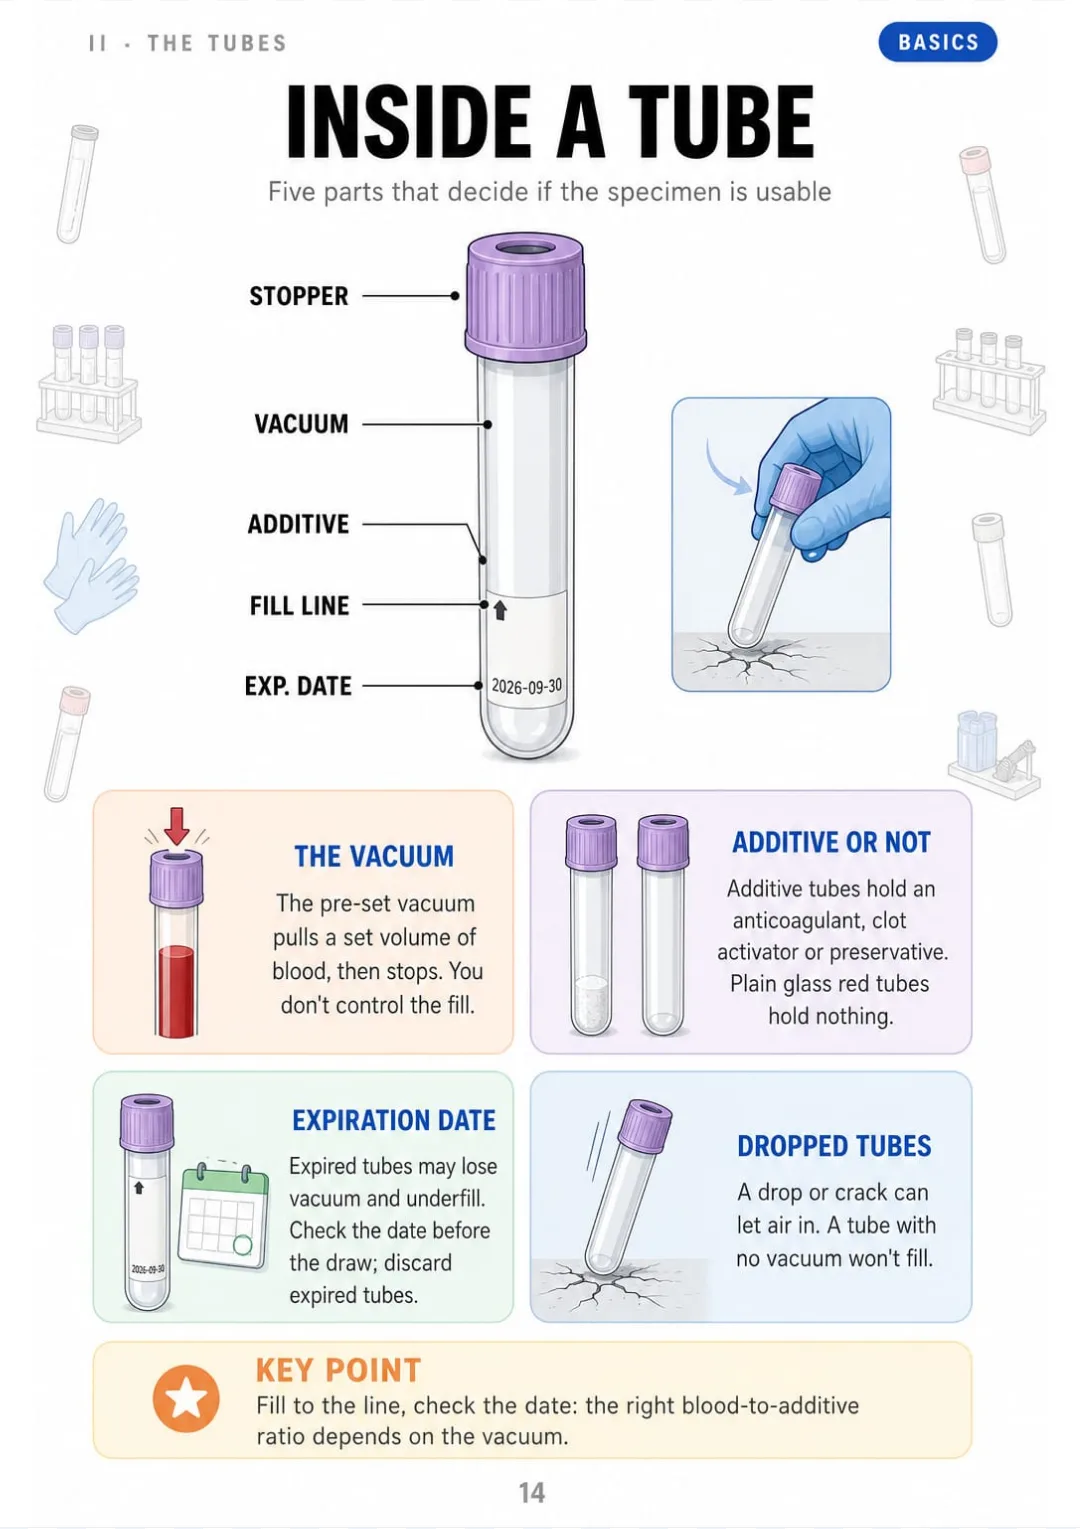
The evacuated tube in cut-away: stopper, vacuum, additive, fill line, expiration date.
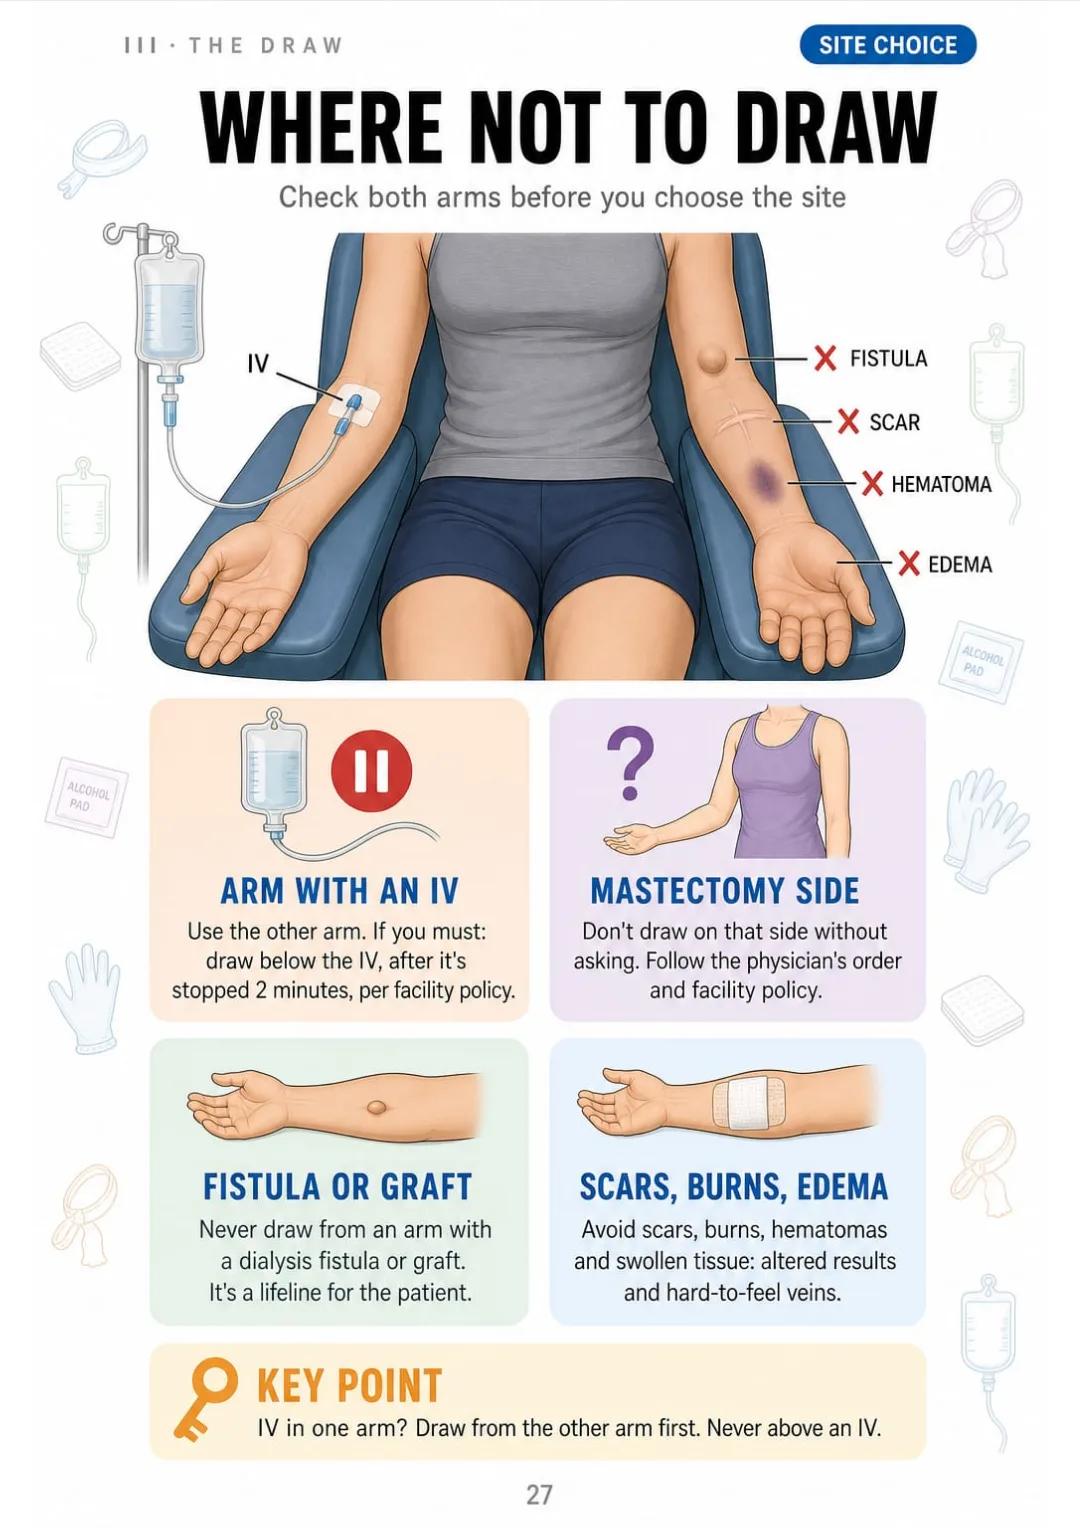
IV, mastectomy, fistula, scars, edema: where you never draw, marked on one arm.
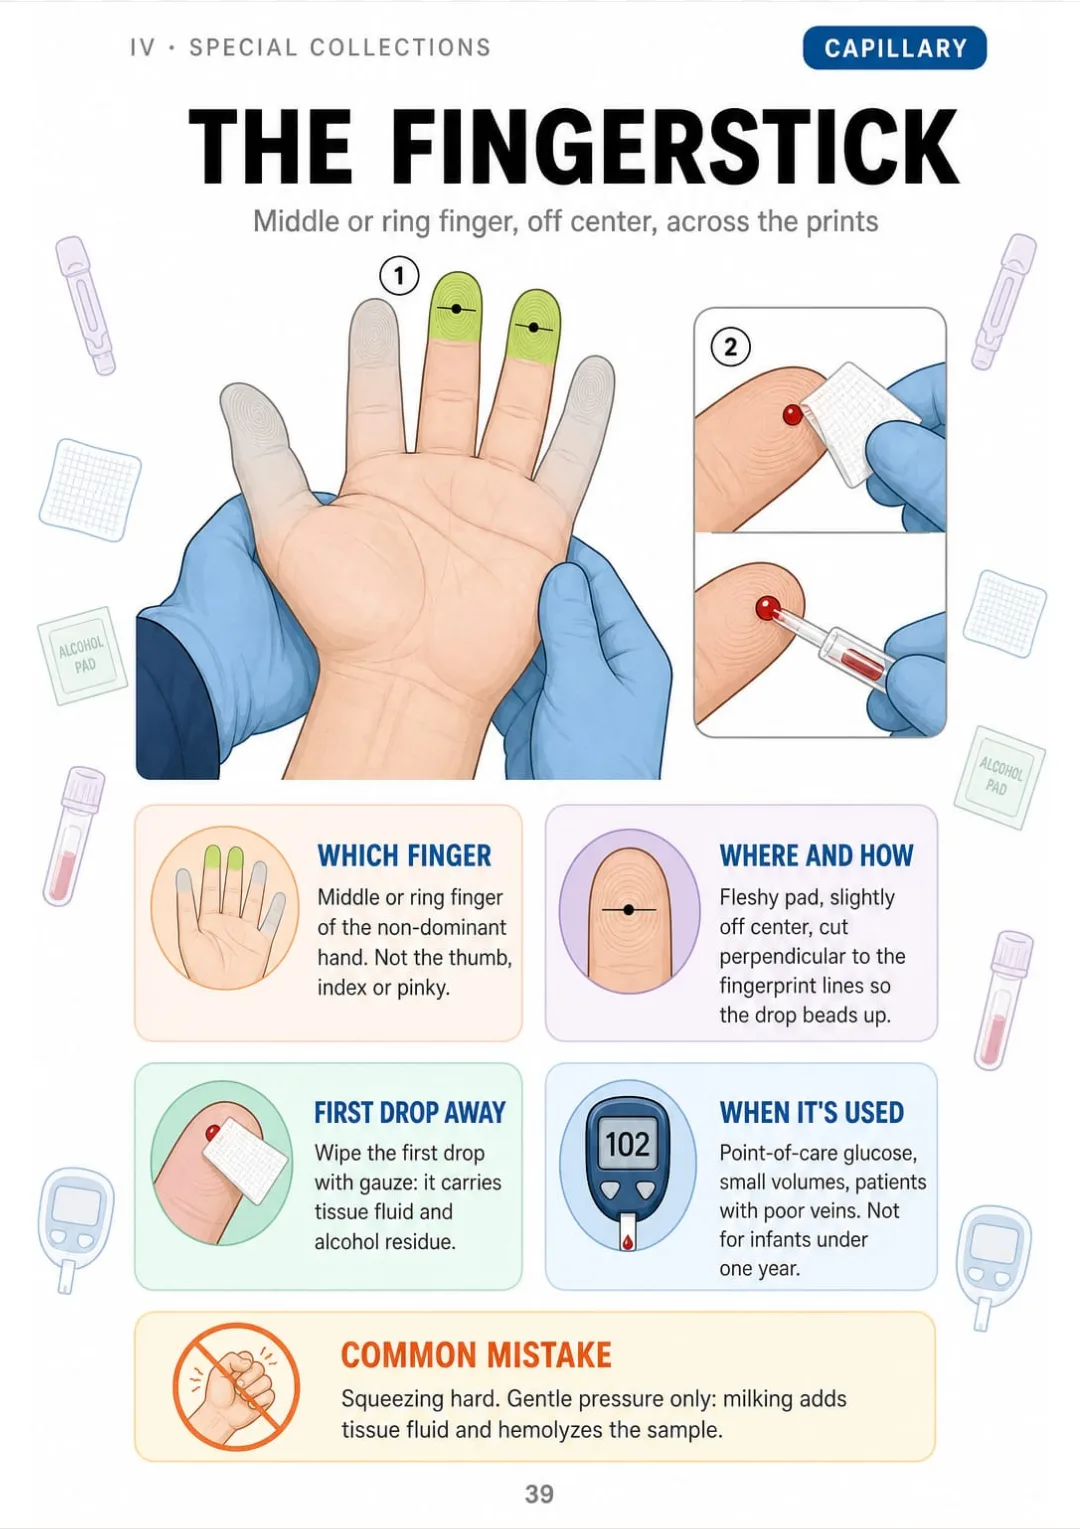
Middle or ring finger, off center, across the prints: wipe the first drop, never milk.
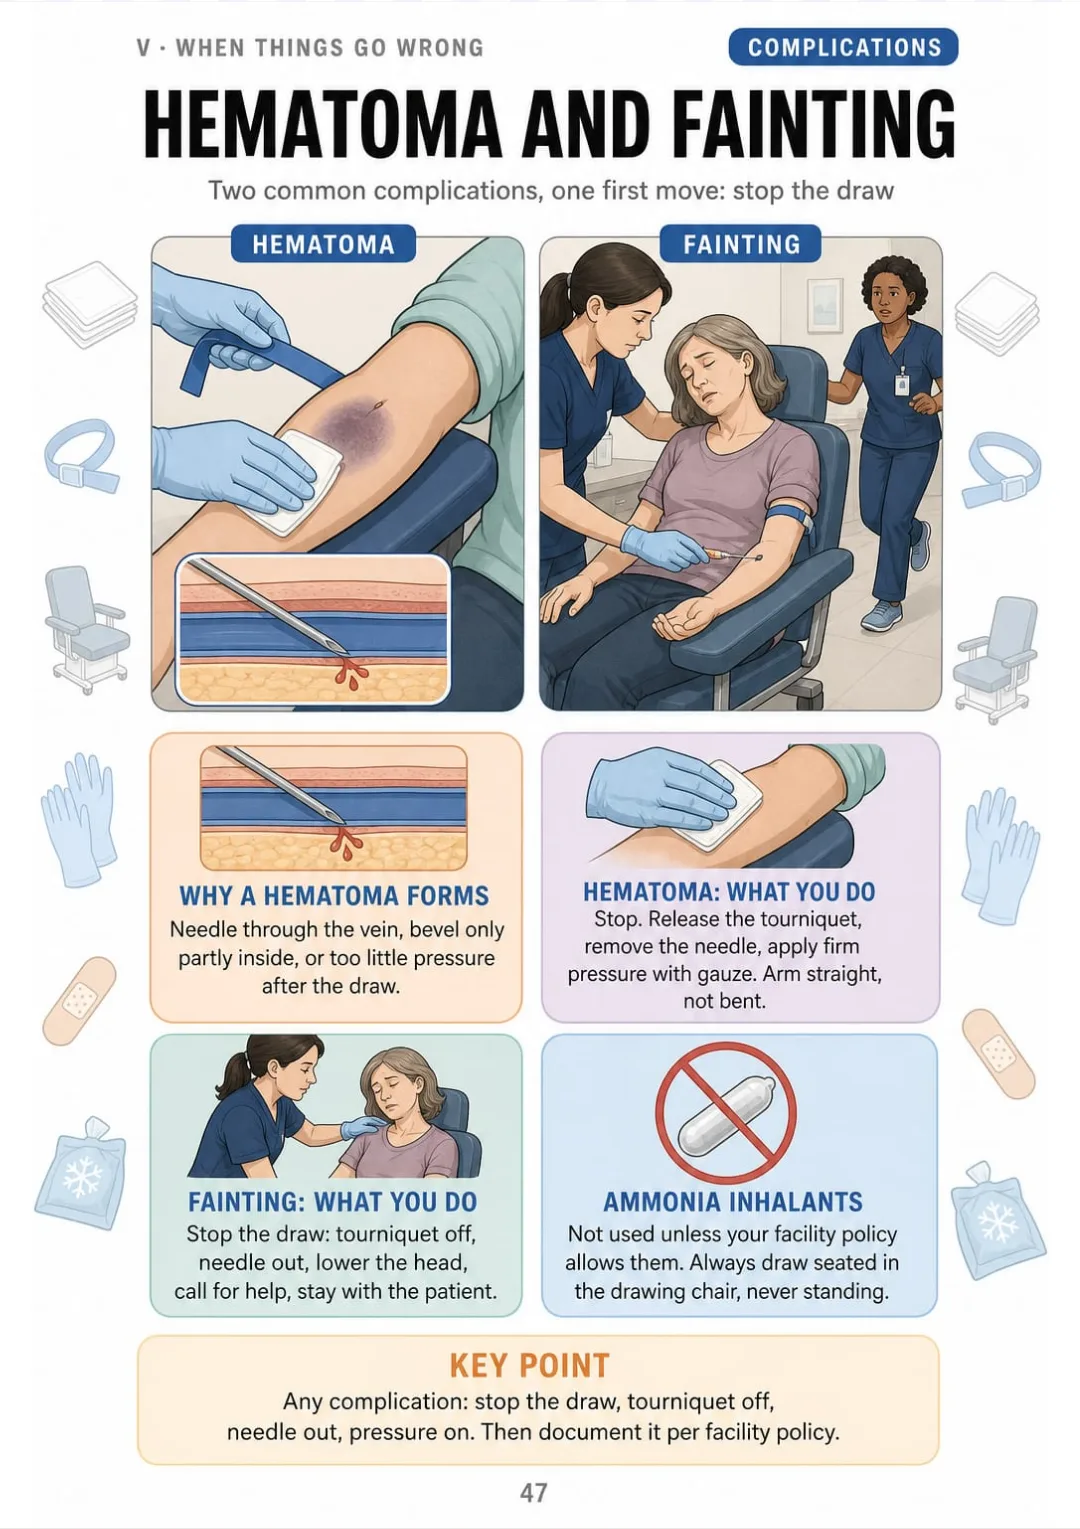
Hematoma and fainting: stop, tourniquet off, needle out, pressure, help.

Swipe to see more →

These are real pages from the book. The table of contents is the full one: 5 parts and 49 topics.

It's Not Your Memory. Nobody Ever Put It in Order for You.

You've copied the order of draw onto flashcards three times. You close your notes...

...and you can't say whether green goes before or after gold, or why. It was just a list of colors, with no reason behind it.

Alcohol rub until dry (~20 s) vs soap and water (≥20 s) for soiled hands or C. diff.

Here, the order of draw is one page with a drawing: every tube lined up by stopper color, and why it goes there. EDTA carried into the wrong tube can falsely raise potassium.

And on the pages next to it, every topic has its own: two identifiers, hand hygiene, needlesticks, the veins of the arm and the fingerstick.

First you understand why it's done that way. Then the order sticks on its own.

SEE THE DIFFERENCE

Stop memorizing steps you can't picture:

THIS
  • Pages and pages of dense text
  • Procedures without a single drawing
  • On the exam, you don't know where to start
Prior to specimen collection, positive patient identification must be established using a minimum of two independent identifiers, typically the patient's full name and date of birth, which shall be compared against the information printed on the requisition and on the identification band affixed to the patient. The patient should be asked to state, rather than confirm, each identifier. The room number or bed location shall not be accepted as an identifier. Any discrepancy must be resolved before collection proceeds, in accordance with institutional policy.
FOR THIS
  • Every technique drawn
  • One topic per page, with the rules in boxes
  • You remember it because you've seen it
Two identifiers (name + DOB), checked against requisition and band; never the room number.
CONTENTS

Take a Look at the 5 Parts and 49 Topics

Before the needle, the tubes, the draw, special collections and when things go wrong: 53 pages, all illustrated

IBefore the Needle · pp. 5-13
  1. What a phlebotomist does
  2. Two identifiers, every time
  3. Hand hygiene and PPE
  4. Standard precautions and needlesticks
  5. The requisition and the label
  6. The tray: everything you need
  7. Needles and gauges
  8. Tube holder, butterfly or syringe?
  9. Review
IIThe Tubes · pp. 14-26
  1. Inside a tube
  2. Serum, plasma or whole blood
  3. Light blue: sodium citrate
  4. Red: the serum tube
  5. Gold (SST): the gel separator
  6. Green: heparin
  7. Lavender: EDTA
  8. Gray: the glucose tube
  9. The other stoppers (pink, royal blue, yellow, tan)
  10. The order of draw
  11. Why the order matters (carryover)
  12. Inversions, tube by tube
  13. Review
IIIThe Draw · pp. 27-38
  1. Where not to draw
  2. The veins of the arm (H and M patterns)
  3. Hand veins
  4. The tourniquet
  5. Cleaning the site
  6. Venipuncture step by step (1): anchor and insert
  7. Step by step (2): fill, release, withdraw
  8. Drawing with a butterfly (discard tube)
  9. Drawing with a syringe (transfer device)
  10. No blood? Fix the needle
  11. After the draw
  12. Review
IVSpecial Collections · pp. 39-46
  1. The fingerstick
  2. The heel stick
  3. Capillary order of draw
  4. Blood cultures
  5. Timed draws: GTT, peak and trough
  6. Ice, light, warmth: special handling
  7. Children, older adults and difficult veins
  8. Review
VWhen Things Go Wrong · pp. 47-53
  1. Hematoma and fainting
  2. Nerves and arteries: when to stop
  3. Hemolysis
  4. Errors that ruin a specimen
  5. Processing and transport
  6. Review
  7. Numbers to remember

What If Every Topic Fit on a Single Page?

Imagine this:

Instead of rereading half a page about the order of draw without being able to picture it...

...you open the page and find every tube lined up by stopper color, with the reason it goes in that spot.

The evacuated tube in cut-away: stopper, vacuum, additive, fill line, expiration date.

And the veins of the arm, the tourniquet, the fingerstick, blood cultures and hemolysis become drawings and tables you can read at a glance.

You stop memorizing and start understanding.

That's exactly what Phlebotomy Made Visual does. 53 pages: 44 illustrated topics, one per page, a review page closing each of the 5 parts and, at the end, a page of numbers to remember. Because what you see in order is easier to remember.

Because what your brain sees organized, it remembers.

Here Is What You Get with Phlebotomy Made Visual:

Ipp. 5-13

Before the Needle

So you start every draw safely: what a phlebotomist does, two identifiers every time, hand hygiene and PPE, needlesticks, the requisition and the label, the tray, needle gauges and when to use a tube holder, butterfly or syringe.

IIpp. 14-26

The Tubes

So you know which tube and why, not just the color: inside a tube, serum vs. plasma vs. whole blood, every stopper color and its additive, the order of draw, why carryover matters and the inversions for each tube.

IIIpp. 27-38

The Draw

So you pick the site and do the draw in the same order every time: where not to draw, the veins of the arm and hand, the tourniquet, cleaning the site, venipuncture step by step, butterfly and syringe draws, what to do when there's no blood, and after the draw.

IVpp. 39-46

Special Collections

So the less routine draws don't catch you off guard: the fingerstick, the heel stick, the capillary order of draw, blood cultures, timed draws, ice, light and warmth, and children, older adults and difficult veins.

Vpp. 47-53

When Things Go Wrong

So you know what to do when something goes wrong, and how to protect the specimen: hematoma and fainting, nerves and arteries, hemolysis, the errors that ruin a specimen, processing and transport, and a page of numbers to remember.

At the end of the book: A review page at the end of every part and a page of numbers to remember.

And That Is Not All: 2 More Books, Free

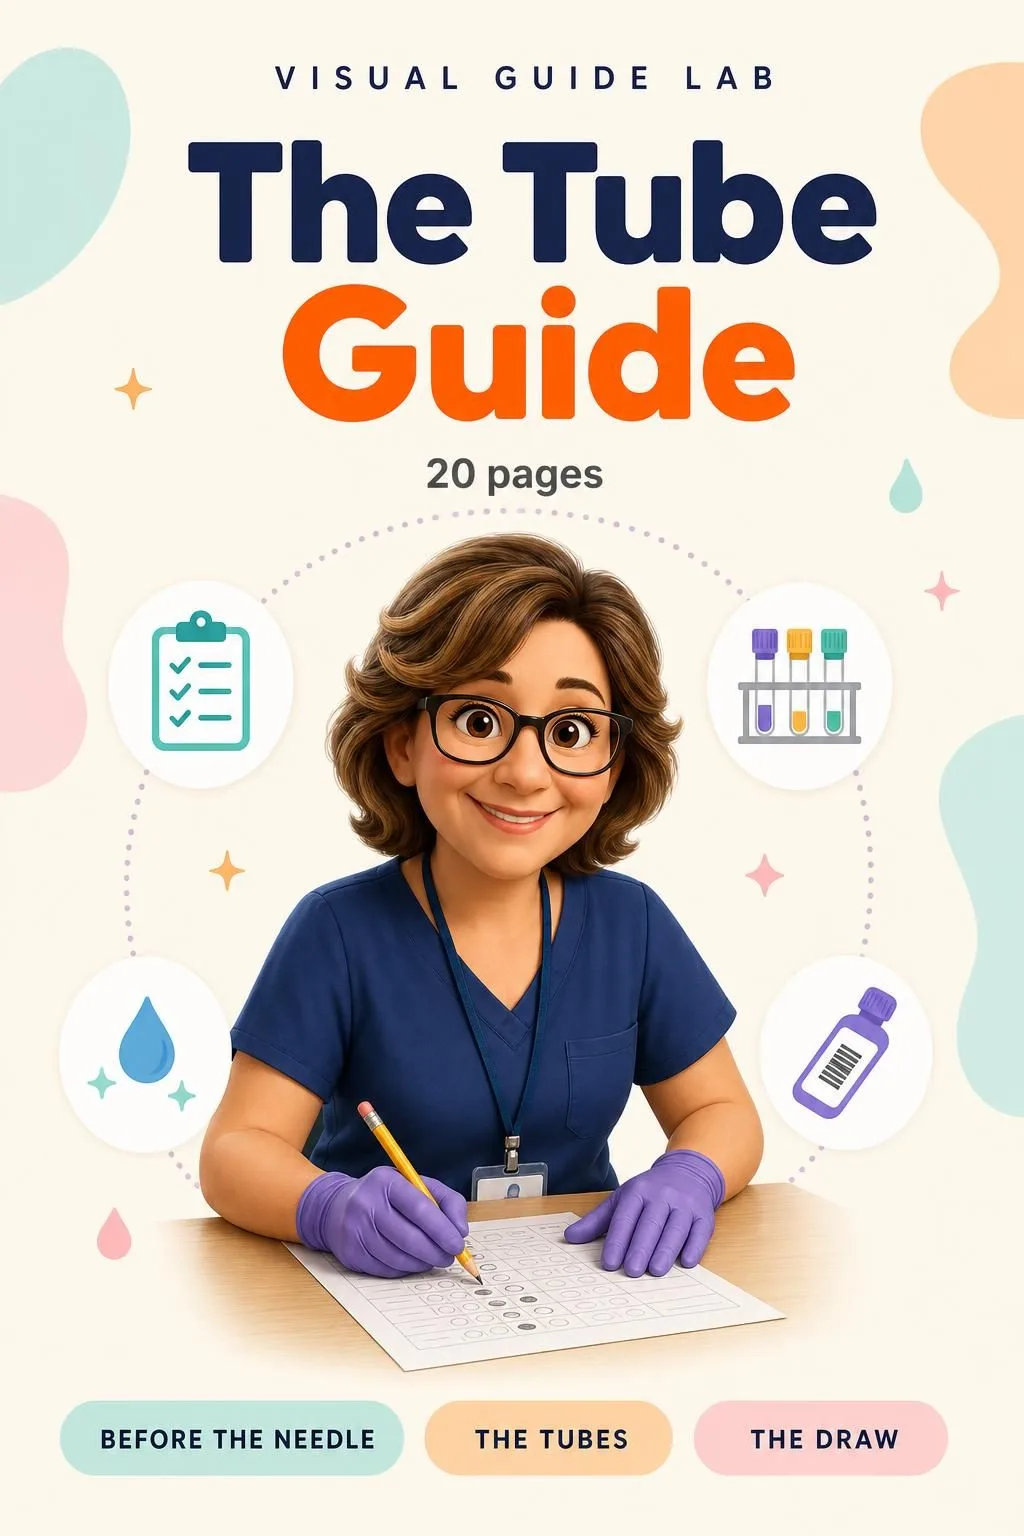
The Tube Guide

BONUS 1: «The Tube Guide»

Value on its own: US$ 17.90

20 pages: one card per tube (light blue, red, gold, green, lavender, pink, gray, royal blue, yellow and tan) with the additive, what you get, the inversions and where it goes in the order of draw; the order of draw and the capillary order as posters; an A-Z finder of which tube for which test; special handling and inversions at a glance. Made to print and keep on the tray.

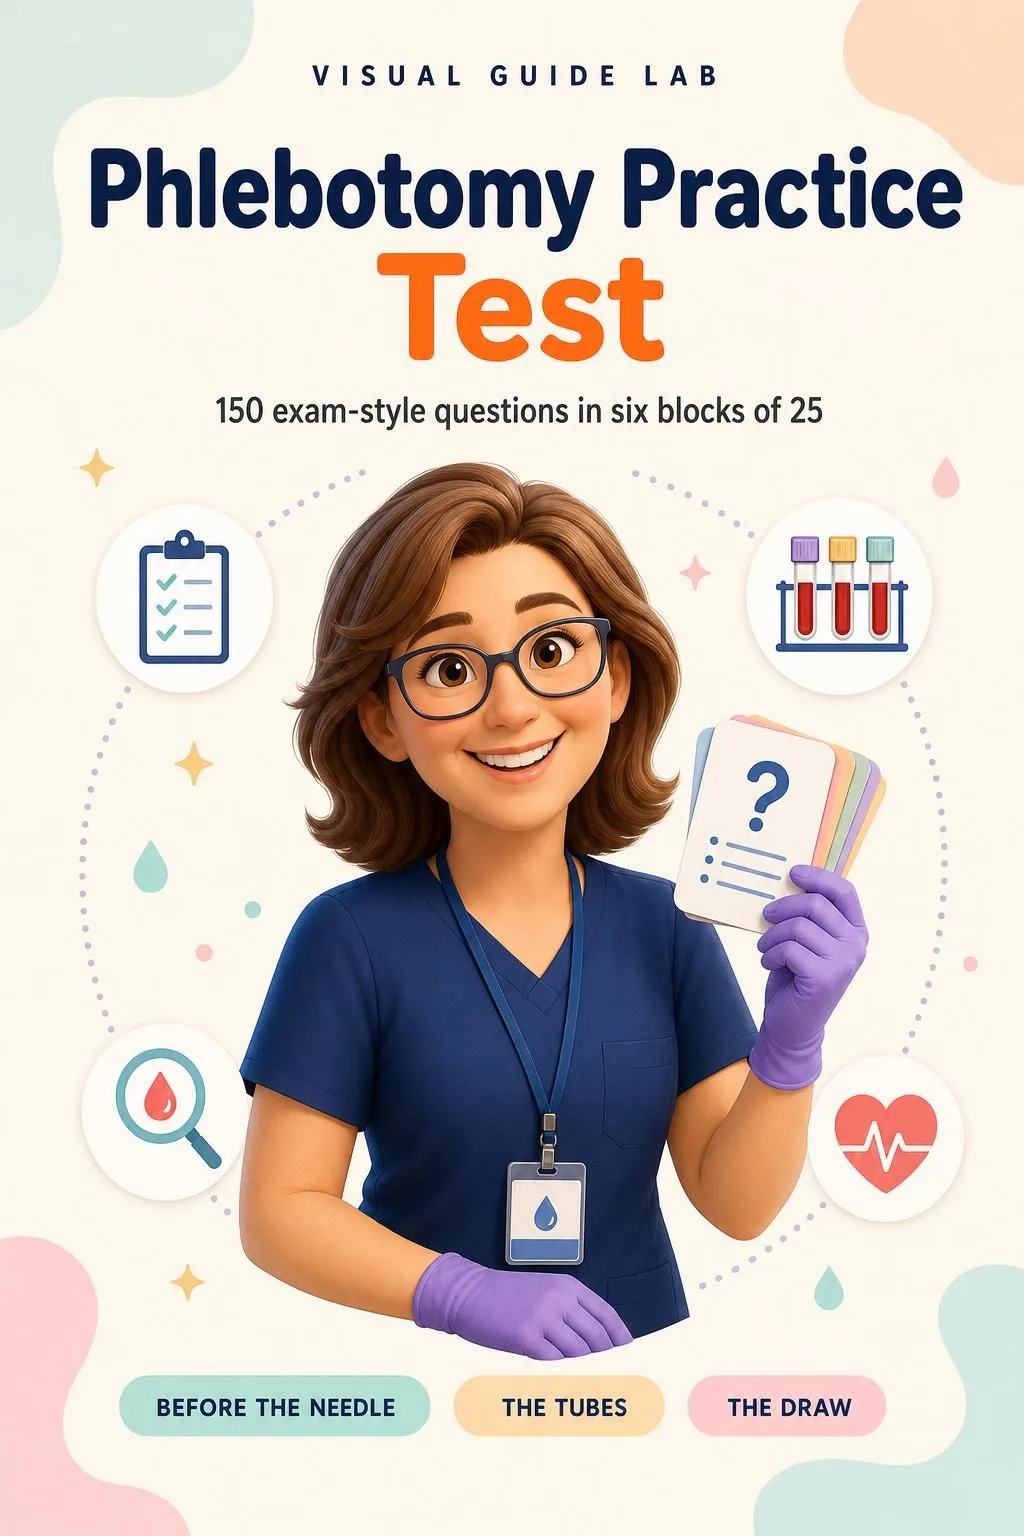
Phlebotomy Practice Test

BONUS 2: «Phlebotomy Practice Test»

Value on its own: US$ 14.90

150 exam-style questions in six blocks of 25: safety, patient ID, equipment and tubes, order of draw, venipuncture and special collections. A printable answer sheet and an answer key with one line on why, plus what to review if you missed it. Written for this book, not official exam questions.

Phlebotomy Made Visual + 2 Free Books

  • Phlebotomy Made Visual: 53 illustrated pagesUS$ 63
  • BONUS 1: The Tube GuideUS$ 17.90
  • BONUS 2: Phlebotomy Practice TestUS$ 14.90
  • High-resolution PDF to printIncluded
Total value US$ 95.80
YOUR PRICE:
US$ 27
You save US$ 68.80
YES, I WANT PHLEBOTOMY MADE VISUAL FOR US$ 27

📄 This is a digital PDF book sent to your email: nothing is printed or shipped.

Secure purchaseEncrypted payment30-day guarantee

PDF by email: Phlebotomy Made Visual reaches your inbox as a PDF, and the two free books come by email too. One-time payment, no installments or hidden costs.

Is This Book for You?

You're in a phlebotomy program

You're in a phlebotomy program

Tubes, veins and venipuncture steps, one topic per page, to review between class, the practice arm and your clinical hours.

Your certification exam is coming up

Your certification exam is coming up

A review of everything from safety to special collections, plus 150 exam-style practice questions with the answers explained.

You already draw blood at work

You already draw blood at work

A quick refresher for every day: the order of draw, inversions, where not to draw and what to do when there's no blood.

To Sum Up: Here Is What You Get

US$ 95.80US$ 27
YES, I WANT PHLEBOTOMY MADE VISUAL FOR US$ 27

📄 This is a digital PDF book sent to your email: nothing is printed or shipped.

30DAYS
GUARANTEE

30-Day Guarantee

30-day guarantee: tell us what didn't work and we'll refund 100%.

You have 30 days to try Phlebotomy Made Visual and the two free books. If a file doesn't open, if the content isn't what this page describes, if you were charged twice or the download never arrived, write to us and we'll refund you in full. One payment, no subscription, no surprises.

Frequently Asked Questions

How do I get the material?

You get an email with Phlebotomy Made Visual as a high-resolution PDF, to read on your phone or print. The two bonus books, The Tube Guide and Phlebotomy Practice Test, come by email too, at the address you enter at checkout.

Is it a monthly or a one-time payment?

A one-time payment. No installments, no subscription.

Who is it for?

For students in a US phlebotomy program, for anyone preparing for a national certification exam (such as NHA CPT, ASCP PBT, AMT RPT or NCCT), and for phlebotomists, medical assistants, CNAs and lab assistants who already draw blood. If you work in California, Louisiana, Nevada or Washington, your state also has its own license requirements: check them with your state. It starts from the basics and goes step by step. Check the table of contents above to see every topic.

What sources is it based on?

The order of draw follows CLSI GP41 and the capillary order follows CLSI GP42. Safety follows the OSHA Bloodborne Pathogens Standard (29 CFR 1910.1030). Topics are aligned with the content outlines of US national phlebotomy certification exams. Where labs differ, the page says so: your facility's manual comes first.

Is this official material?

No. It's independent study material. It isn't endorsed by NHA, ASCP, AMT, NCCT, CLSI or OSHA, and it doesn't give you a certificate, CEUs or a license: those come from your program and your certification exam.

Does it replace my phlebotomy program?

No. It doesn't replace your program, supervised clinical practice or your facility's procedure manual. What it adds to your course book: every topic drawn on one page, the tubes lined up in the order of draw with the reason for each spot, and 150 practice questions with the answers explained. It helps you understand and review what you learn there.

Are the practice questions from the real exam?

No. The 150 questions are written for this book. They aren't official exam questions: they're there to help you practice.

Can I print it?

Yes. It's a PDF you can print at home or at a print shop. The Tube Guide is made to print and keep on your tray.

What if I don't like it?

You have 30 days: if a file doesn't open, if the content isn't what this page describes, if you were charged twice or the download never arrived, write to us and we'll refund you.
One Last Thing Before You Decide...

You don't have to reread the same page hoping it sticks this time.

You don't have to memorize tubes and steps you can't picture.

And you definitely don't have to walk into your exam not knowing where to start.

There's a simpler way. And it's one click away. Now it's your turn.

One-time payment: US$ 27 · Guarantee: 30 days · PDF by email

YES, I WANT PHLEBOTOMY MADE VISUAL FOR US$ 27

📄 This is a digital PDF book sent to your email: nothing is printed or shipped.